
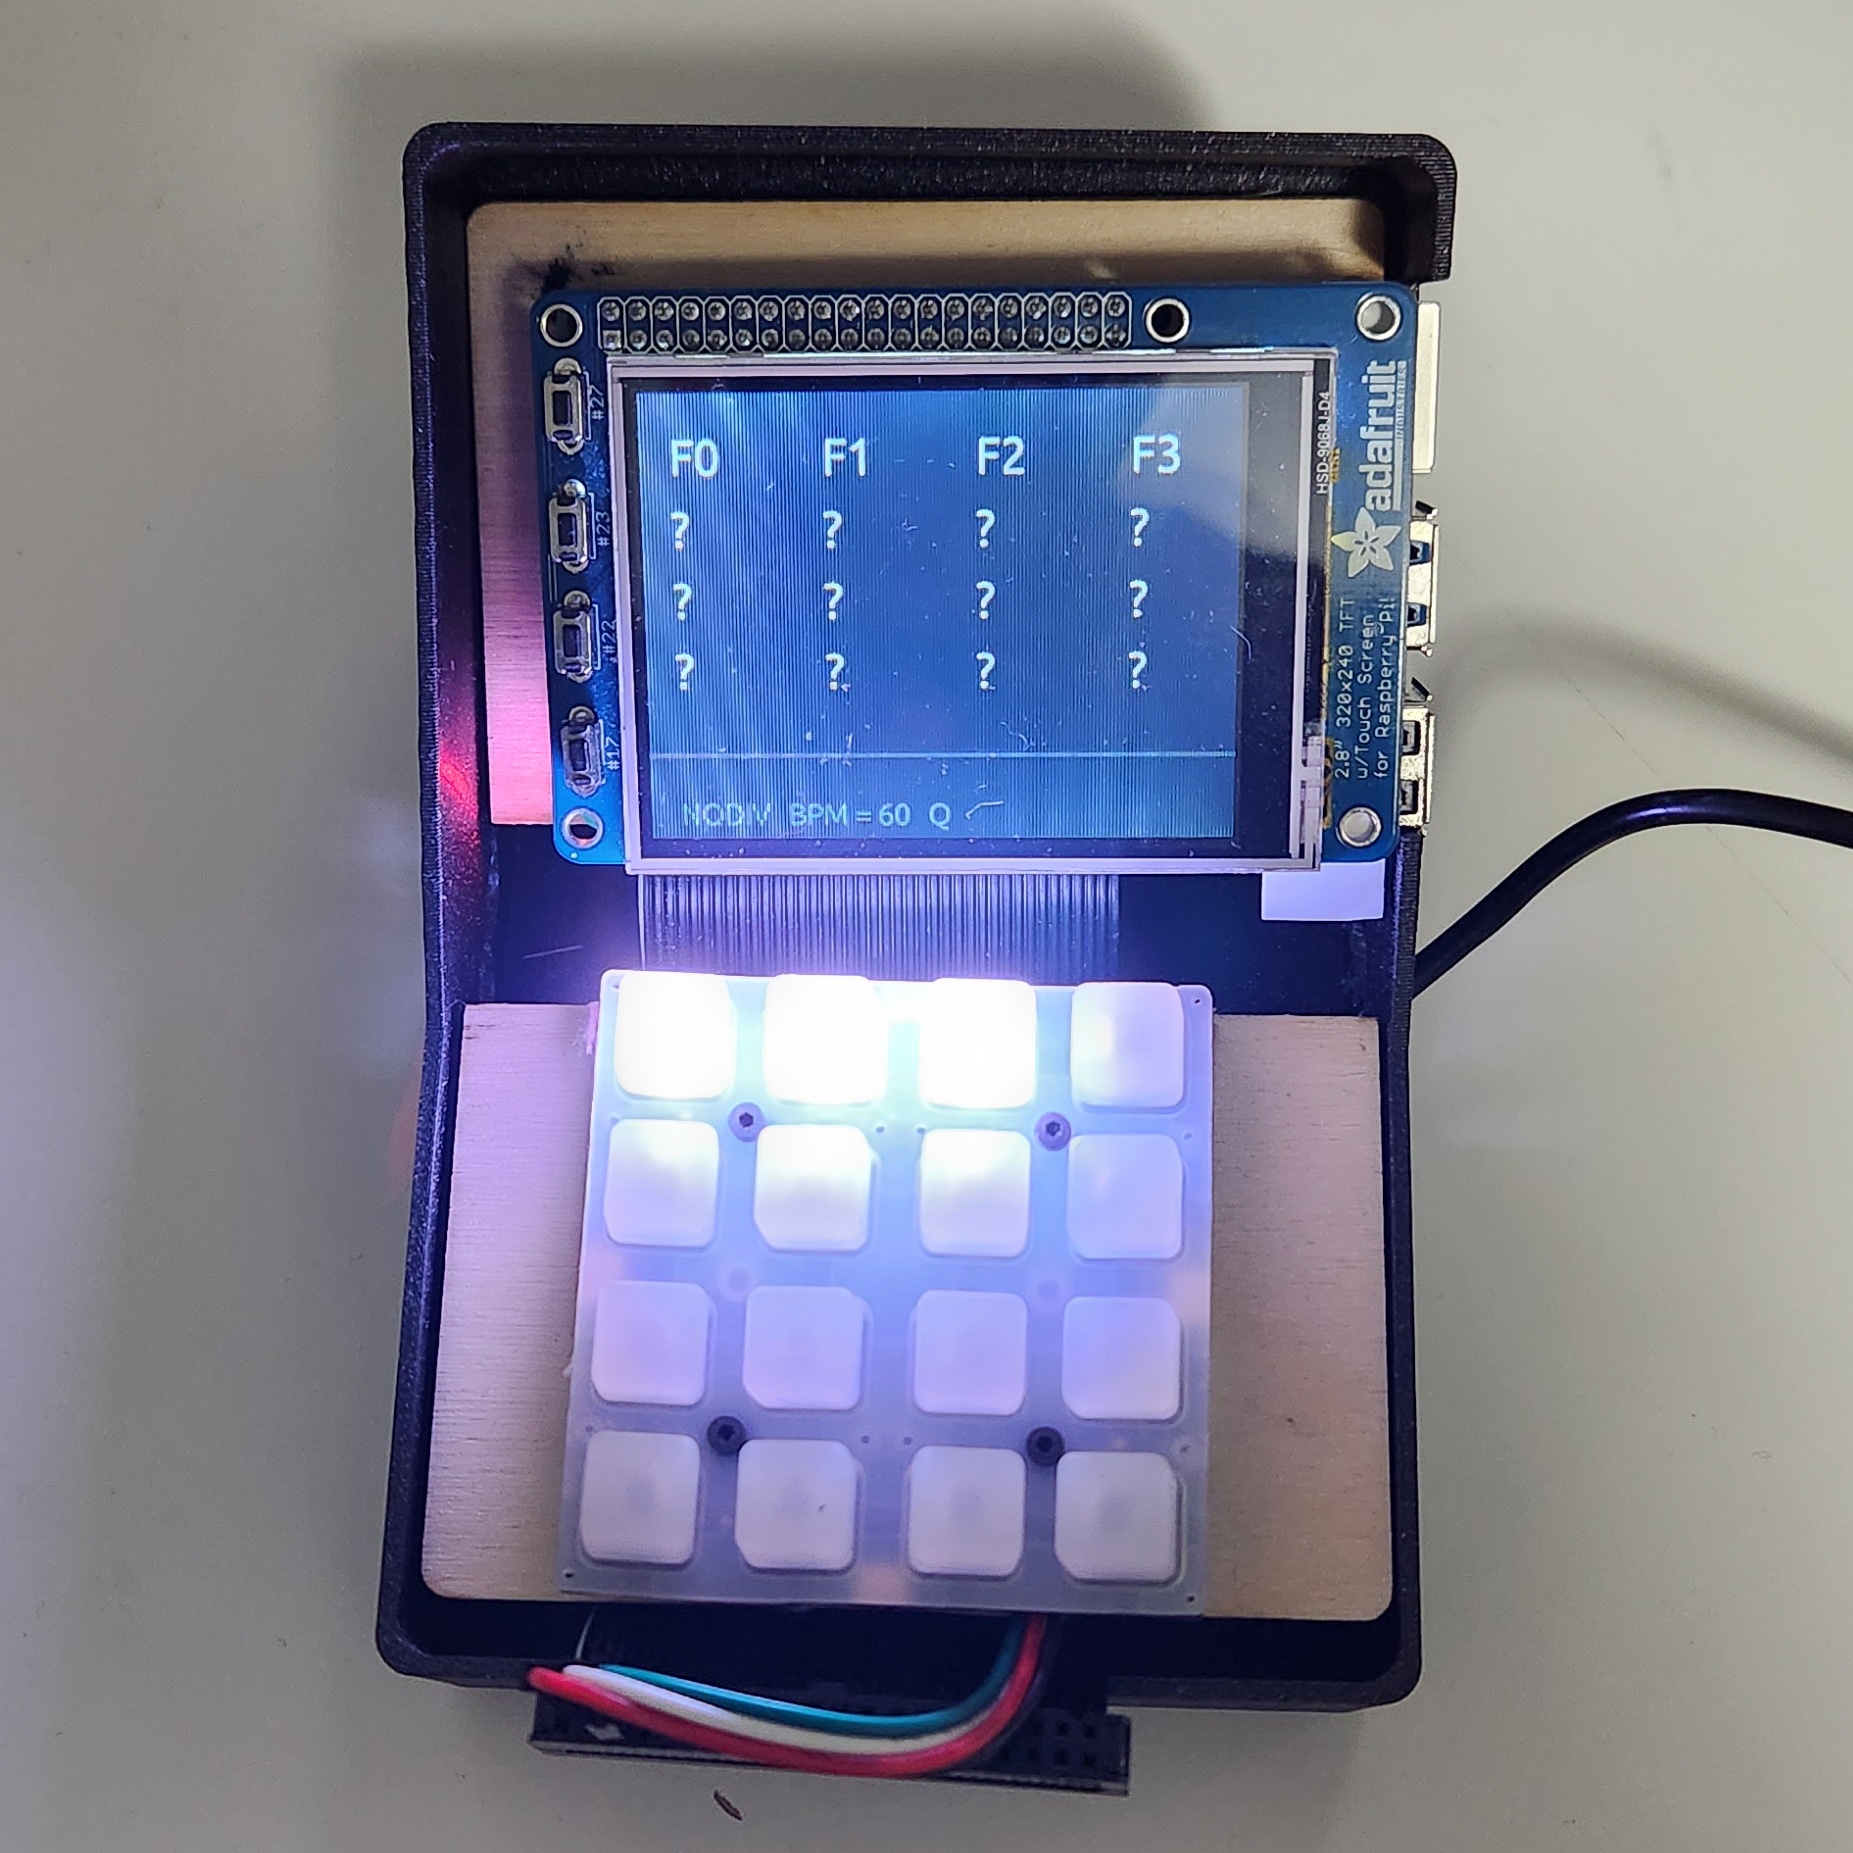
I made a Raspberry-Pi based drum pad / sequencer. It’s a device with a 4x4 keyboard and a display that contains a large number of short audio files and allows the user to bind the keys to audio files. With these bindings, the user is able to play the audio clips rhythmically to create music! The sequencer functionality makes this easier by automatically playing sound clips at a certain tempo, so that the user does not have to press so many buttons every measure. It produces audio via the 3.5mm jack on the Raspberry Pi, allowing to be used with headphones or with speakers, and the keyboard lights up interactively to indicate the current state of the user interface.
The design of this project was mostly about the hardware (e.g., the case) and the software, as the electronics were not particularly involved.
The software for this project is an executable called
pidj that runs when the Pi starts up. This executable is
written in Rust, and the source code is available here. Here are the
components:
src/driver)The keyboard driver communicates the keyboard over I2C to change the
lights on the keys and receive key presses. It is based on the adafruit-seesaw
Rust crates by Ferrous Systems, as well as the original Adafruit_Seesaw
C++ library by Adafruit. While writing this report, I also discovered
the adafruit-neotrellis
Rust library by Ferrous Systems, but I was not aware of this library
when I was writing my NeoTrellis driver; instead I did it entirely by
reverse-engineering the C++ code.
I modified the code from these libraries to suit my coding style and
my hardware. The libraries by Ferrous Systems are designed to be used in
a #[no_std] environment, meaning that they will work
without depending on any services provided by an operating system or a
standard library. However, since the Raspberry Pi does have an operating
system, this isn’t necessary, and designing for #[no_std]
constrains the way the API is written a little bit, so I got rid of
these constraints to make the code more ergonomic.
src/keyboard.rs)When the program starts, it creates an instance of the keyboard driver. It then starts two threads, one which updates the colours of the pixels, and one which listens for key presses. They share access to the keyboard driver using a mutex, and communicate with the other threads using channels.
src/audio.rs)When the program starts, it searches the /home/pi/audio
folder for all .wav, .mp3, and
.flac files. Once it has found all of them, it preloads all
of them (opens each file and decodes the headers to ensure that it is a
valid audio file). This does not load all of the files into memory just
yet (pidj would crash!).
After all of the files have been preloaded, the audio thread waits
for the GUI to send commands which tell it to play a certain audio file.
The audio files are buffered so that playing an audio file also loads it
into memory, and the file doesn’t have to be reloaded in order to play
it again. All of the audio playback is accomplished with the help of the
rodio
crate.
src/app.rs)When the program starts, it launches a GUI constructed using the egui
crate. This GUI communicates with the other threads using channels and
keeps track of the current state of the application.
The app has two states, Loading and Play.
It starts out in Loading and switches to Play
once the audio thread signals that all of the audio files have been
preloaded.
Once in Play, there is a sub-state Reassign
which is for changing which sound is bound to a certain keyboard button.
Besides this, the Play state keeps track of which keys are
currently pressed so it can reflect this in the UI, and it keeps track
of information related to the sequencer.
The GUI also maintains a background thread for the sequencer, which loops 60 times per second (or more, dependin on the BPM setting of the sequencer) and sends commands to the audio thread.
fbcpAll of the GUI frameworks I could find expected a proper desktop environment in order to work, which meant I could not render to the PiTFT display directly as a framebuffer device (which is what we did for the PyGame programs in class).
To get the Raspberry Pi desktop to appear on the PiTFT display, I
installed a program called fbcp on the Pi and set it up to
run at boot. Apparently, the Raspberry Pi desktop can only be rendered
to the HDMI port due to shortcuts that were taken to improve graphics
performance. fbcp works by copying the HDMI framebuffer to
the PiTFT framebuffer after each frame.
systemdI created a systemd service for pidj to get
it to launch at boot.
To test this program, I wrote a simple script that compiles the program, copies it to the Pi, and then runs it with the relevant environment variables. This worked pretty well before I started trying to add a GUI to my app, which leads me to this point: writing this app in Rust was not that great of an idea.
Rust is my strongest programming language by far, and it does well with programs that have tight performance constraints (a program for creating music can’t have too much latency or else it won’t work) and need multithreading. However, I had never created a GUI application in Rust before, only CLI apps, and I severely underestimated how difficult this part would be due to the immaturity of the Rust ecosystem in this particular area and the design of Rust itself.
I tried two other Rust GUI libraries, iced and
druid, before I settled on egui. Both of these
were overkill for my needs and had steep learning curves and unfinished
documentation, despite being some of the most popular Rust GUI
libraries. Moreover, they had cumbersome dependencies.
iced wasn’t too bad, as it renders its UI directly, and
so it only depends on a graphics runtime. I was able to get it to work
by just switching the backend from Vulkan (which is not really supported
in my Raspberry Pi configuration) to OpenGL.
druid was a huge pain because it delegates rendering to
GTK, meaning that it depended on GTK and all of GTK’s dependencies. This
would not have been an issue, except that I was cross compiling
my program.
Compiling Rust programs on a Raspberry Pi is far too slow. A program that compiles in a couple of minutes on my laptop might takes half an hour or more on a Pi. To get around this, I compile the program on my computer and then copy it to the Pi. But because the Pi has an ARM processor, I need to cross-compile the program (use my x86-64 computer to generate a binary containing ARM instructions). In Rust, this is easy as long as all of the program’s transitive dependencies are entirely in Rust. Once the program depends on any shared libraries (such as GTK or ALSA), it becomes a huge problem because the program needs to link against versions of these shared libraries that match the architecture I am targeting.
I first ran into this problem when I added rodio to my
program because it depends on ALSA. Fortunately, ALSA doesn’t have any
dependencies of its own, so it was easy to cross compile (I already had
an ARM cross-compiler on my computer because I write Rust programs for
the Raspberry Pi often).
However, with GTK, it was impossible, because GTK has a huge number of required transitive dependencies:
at-spi2-atk-2.38.0
at-spi2-core-2.44.1
dbus-1.14.4GLib-2.74.3Fontconfig-2.14.1
FreeType-2.12.1libxcb-1.15ATK-2.38.0
GLib-2.74.3gdk-pixbuf-2.42.10
GLib-2.74.3libjpeg-turbo-2.1.4libpng-1.6.39shared-mime-info-2.2
libxml2-2.10.3libepoxy-1.5.10
Mesa-22.2.4
libdrm-2.4.114
Mako-1.2.4
MarkupSafe-2.1.1Pango-1.50.12
Fontconfig-2.14.1FriBidi-1.0.12GLib-2.74.3This is too much stuff to compile from source! Considering the
limited amount of time that I had, and the fact that several of these
libraries use meson as their build system (I don’t know how
to cross compile using meson!), and that compiling all of
these libraries would probably take thirty hours in build times alone,
cross-compiling directly on my computer was a non-starter.
Luckily, I had a solution that I had developed for my project team:
cross-compile inside of a Docker container! Debian repositories have
pre-compiled ARM versions of all of these libraries available via the
package manager. By running the Rust compiler inside of the Docker
container with these libraries downloaded from apt, I could
avoid compiling them myself.
This is where the docker folder comes in. I used
docker/justfile to hold the parameters that I used to
generate the Docker image. Then the justfile in the root
directory contains scripts that invoke the image to build the binary and
copy it to the Pi.
Even though it worked in the end, it is because of this cross-compiling issue that I recommend that anyone taking this class avoid compiled languages and just use Python! I would have written my program in Python if I had to do it again.
I designed a case for the device that would hold together the Pi and the keyboard in a neat little enclosure. It features laser-cut wooden plates for mounting the Pi and the keyboard which are removable so that it is easy to tuck the wires underneath them.
However, I didn’t really have time to iterate on this design properly. There is barely enough clearance for my 3.5mm audio cable to fit inside of the case; it runs into the plate that holds the keyboard. There was no space whatsoever for the ribbon cable that allows GPIO access when the PiTFT display is mounted. And I forgot to include holes in the side of the case for the power and audio cables to come out. A revision of the design would feature more space inside of the case for the wires and the necessary holes.
For the demo, I patched these issues by drilling the holes with a power tool and adding padding around the wooden plates with cardboard and foam to increase the clearances.
The device worked as designed at demo time. Success!
In my progress reports, I mentioned that I was considering adding a built-in speaker and a complex software timeline for sequencing the audio. I didn’t have time to implement either of these features, but that is okay because they were stretch goals to begin with.
There is room for expansion with a project like this. The sequencer could be made more sophisticated (ex.: add a way to remove specific sounds from the looper instead of clearing all of them) and the case could be more streamlined. Now that the software infrastructure is in place (Docker build system and GUI in particular), this type of iteration is achievable.
I no longer think adding an integrated speaker is a great feature, since a device like this is easier to use with headphones, and the 3.5mm audio cable can be connected to an external speaker if needed.
As I mentioned, if I were to do this project again, I would manage my time more aggressively and probably write it in Python, because I don’t think this project justifies the level complexity that it has.
| Item | Price | Notes |
|---|---|---|
| 3D printed case | $0.00 | printed at RPL |
| Wooden inserts | $0.00 | laser cut at RPL |
| Raspberry Pi 4 | $0.00 | provided by course |
| Raspberry Pi DC adapter | $0.00 | provided by course |
| PiTFT display | $0.00 | provided by course |
| M2 nuts & bolts | $0.00 | borrowed from CUAir |
| Adafruit NeoTrellis keyboard | $12.50 | |
| Adafruit Silicone Elastomer keyboard cover | $4.95 | |
| Adafruit STEMMA I2C cable | $0.75 | |
| Adafruit shipping fees | $20.10 | bruh |
| 3.5mm audio cable | $0.00 | already had one |
adafruit-seesaw:
A Rust driver for Adafruit Seesaw-based devices by Ferrous Systems.Adafruit_Seesaw
A C++ driver for Adafruit Seesaw-based devices by Adafruit.Dockerfile is
based on the one I wrote for the plane system. The source code for this
project is private.